If you’re a VS Code user who is in first year, or isn’t too used to coding locally, you might be better off checking the easier method of using SSHFS with VS Code here .
Hello! About a year and a half ago, I wrote a blogpost about setting up Visual Studio Code to connect to CSE machines using the ‘Remote - SSH’ extension.
In hindsight, this was a terrible mistake with consequences I could not have foreseen. It turns out that the extension spawns a nodejs server on the remote machine for each connection, which requires an intense amount of resources 1.
Anyhow, this guide steps through setting up SSHFS to mount and access your CSE filesystem from your local file system! Doing so allows you to access files on CSE machines as if they are on your own computer, and automatically synchronises any changes to files. This method likely uses less than a tenth of the resources required by the VS Code remote extension!
Who is this guide for?
If you’ve reached the end of the first year of your CSE degree, you probably should have a local coding setup by now, whether that be:
- a native Linux (or *nix) setup, or
- some form of macOS setup, or
- WSL 2 2
In that case, I highly recommend using SSHFS if you find yourself needing to work with files directly on CSE machines. If you’re in first year and feeling adventurous, you can take a try at setting it up too, but you’re probably better off following this guide . 3
Getting started 🎉
obligatory disclaimer: despite being employed by cse at the time of writing, this does not reflect the views of my employer. you get it, don’t you? 👌👌
Now that that’s out of the way, we’ll need to install SSHFS to get started.
Linux and WSL 2
Otherwise, all you’ll need to do is open a terminal and run sudo apt install -y openssh-client sshfs on your own computer.
macOS
- Install MacFUSE Run
brew install --cask macfusein your terminal. Go to System Preferences → Security & Privacy, enable the new system extension, then restart. - Install sshfs Run
brew install gromgit/fuse/sshfs-macin your terminal and follow any steps which pop up.
Mounting your CSE home directory
Our goal is to be able to access our CSE files from our own computer. To do this, we’ll need to use SSHFS to mount them.
- If this is your first time, make a directory in your local home directory by running
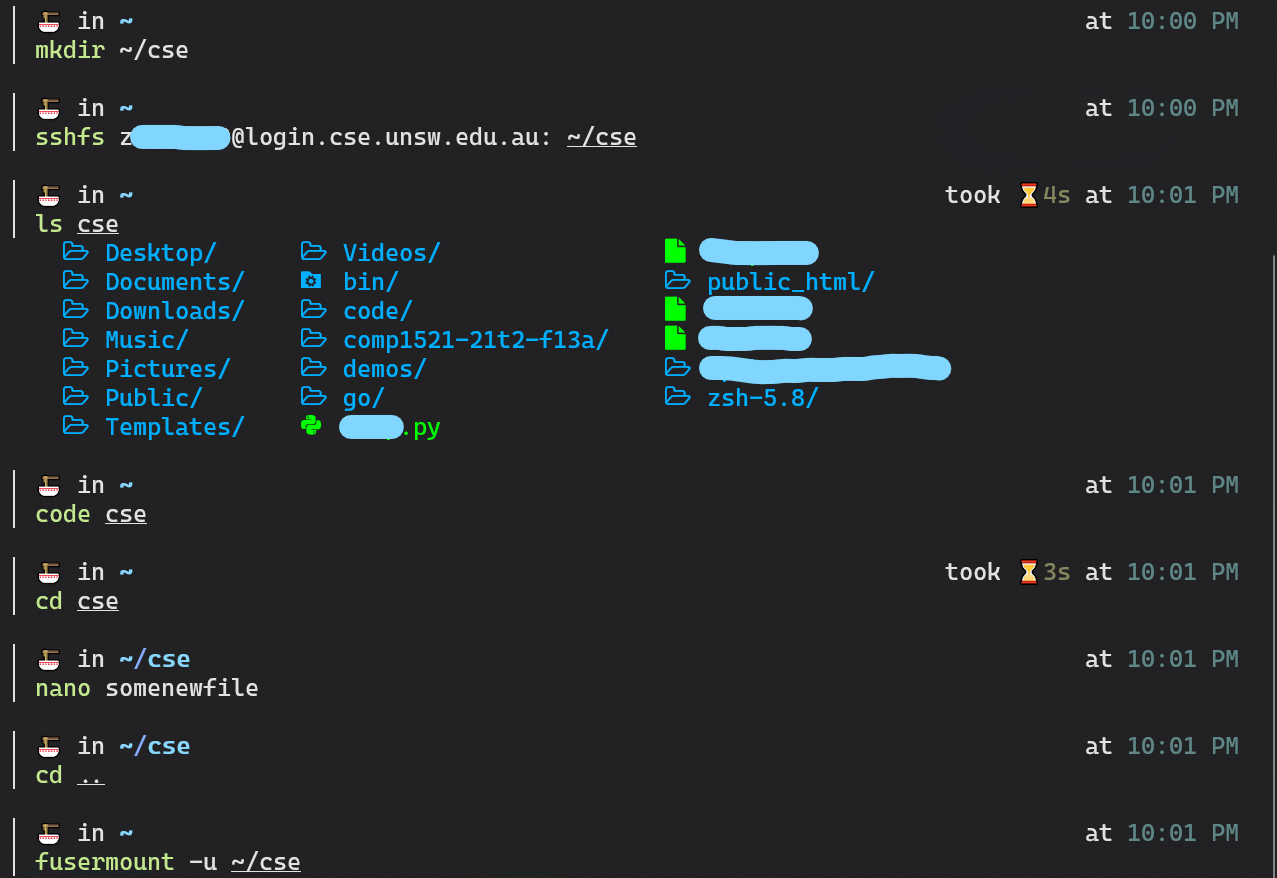
mkdir ~/csefrom a terminal. If you want to use a different folder name, feel free to do so, but make sure to use it instead in any future commands. It’s important that this is an empty folder. - Run the following command:
sshfs -o idmap=user -C z5555555@loginX.cse.unsw.edu.au: ~/cse, replacing with your own zID, and replacing the X with the last digit of your zID. For example, if your zID was z5123456, you’d uselogin6.cse.unsw.edu.au.
Yay! Your CSE files should now be accessible in the ~/cse directory! You can now access them with the text editor of your choice! For example, if you’re a VS Code user, you can run code ~/cse to open a new workspace 4.
Once you’re done working, you should unmount the CSE filesystem. To do this, run fusermount -u ~/cse on Linux, or unmount -f ~/cse on macOS5.
In order to get a shell on CSE machines and run commands such as autotest and give, you’ll need to run ssh z5555555@loginX.cse.unsw.edu.au, (again, with your own zID, and replacing X with the last digit of your zID) and type in ‘yes’ if any prompts appear. Use Ctrl+D to exit when you’re done.
Setting up SSH keys
If you’re being prompted for your password whenever using SSHFS or SSH, setting up a pair of SSH keys (if you haven’t already) is probably a good idea. You can do this by following Part 4 and 5 of the ‘SSH and SSH keys’ section here .
Aliases
Typing in all these commands gets a bit cumbersome. We can use aliases to simplify this process a bit for us!
Determining your shell
Before we can figure out where to keep our aliases, we’ll need to figure out what shell we’re doing. In order to do this, run echo $SHELL.
It’s likely that your shell is either bash or zsh (if not, you’re probably cluey enough to figure the rest out yourself). If you’re on bash, open or create the file ~/.bashrc. If you’re on zsh, open or create ~/.zshrc in the text editor of your choice (eg. code ~/.zshrc).
Adding our aliases
Create a newline at the end of the file you just opened, and paste in the following, being sure to replace with your own zID (also make sure to not add a space after the equals sign):
# Your zID (change this)
_SSHFS_ZID=z5555555
# Your desired mountpoint for your CSE home directory
_SSHFS_CSE_MOUNT="$HOME/cse"

alias csemnt="sshfs -o idmap=user -C ${_SSHFS_ZID}@login${_SSHFS_ZID: -1}.cse.unsw.edu.au: ${_SSHFS_CSE_MOUNT}"
alias cseumount="fusermount -zu ${_SSHFS_CSE_MOUNT}"

function cse() {
    # determine where we are relative to the mountpoint (thanks @ralismark)
    local rel=${PWD##${_SSHFS_CSE_MOUNT}}

    if [ -z "$1" ]; then
        # if we don't have arguments, we give the user a shell on the remote cse machine.
        if [ "$PWD" = "$rel" ]; then
            # in the case that we're not in our mountpoint, provide a shell in their home directory.
            ssh "${_SSHFS_ZID}@login${_SSHFS_ZID: -1}.cse.unsw.edu.au"
        else
            # if within the mountpoint, cd to the equivalent dir on the remote before providing a shell (thanks @ralismark)
            ssh "${_SSHFS_ZID}@login${_SSHFS_ZID: -1}.cse.unsw.edu.au" -t "cd $(printf "%q", "./$rel"); exec \$SHELL -l"
        fi
    else
        # if we have arguments, we have a command to execute.
        if [ "$PWD" = "$rel" ]; then
            # in the case that we're not in our mountpoint, we'll execute in the home directory.
            ssh -qt "${_SSHFS_ZID}@login${_SSHFS_ZID: -1}.cse.unsw.edu.au", "$@"
        else
            # if within the mountpoint, cd to the equivalent dir on the remote before executing (thanks @ralismark)
            ssh "${_SSHFS_ZID}@login${_SSHFS_ZID: -1}.cse.unsw.edu.au" -qt "cd $(printf "%q", "./$rel") && $(printf "%q ", "$@")"
        fi
    fi
}
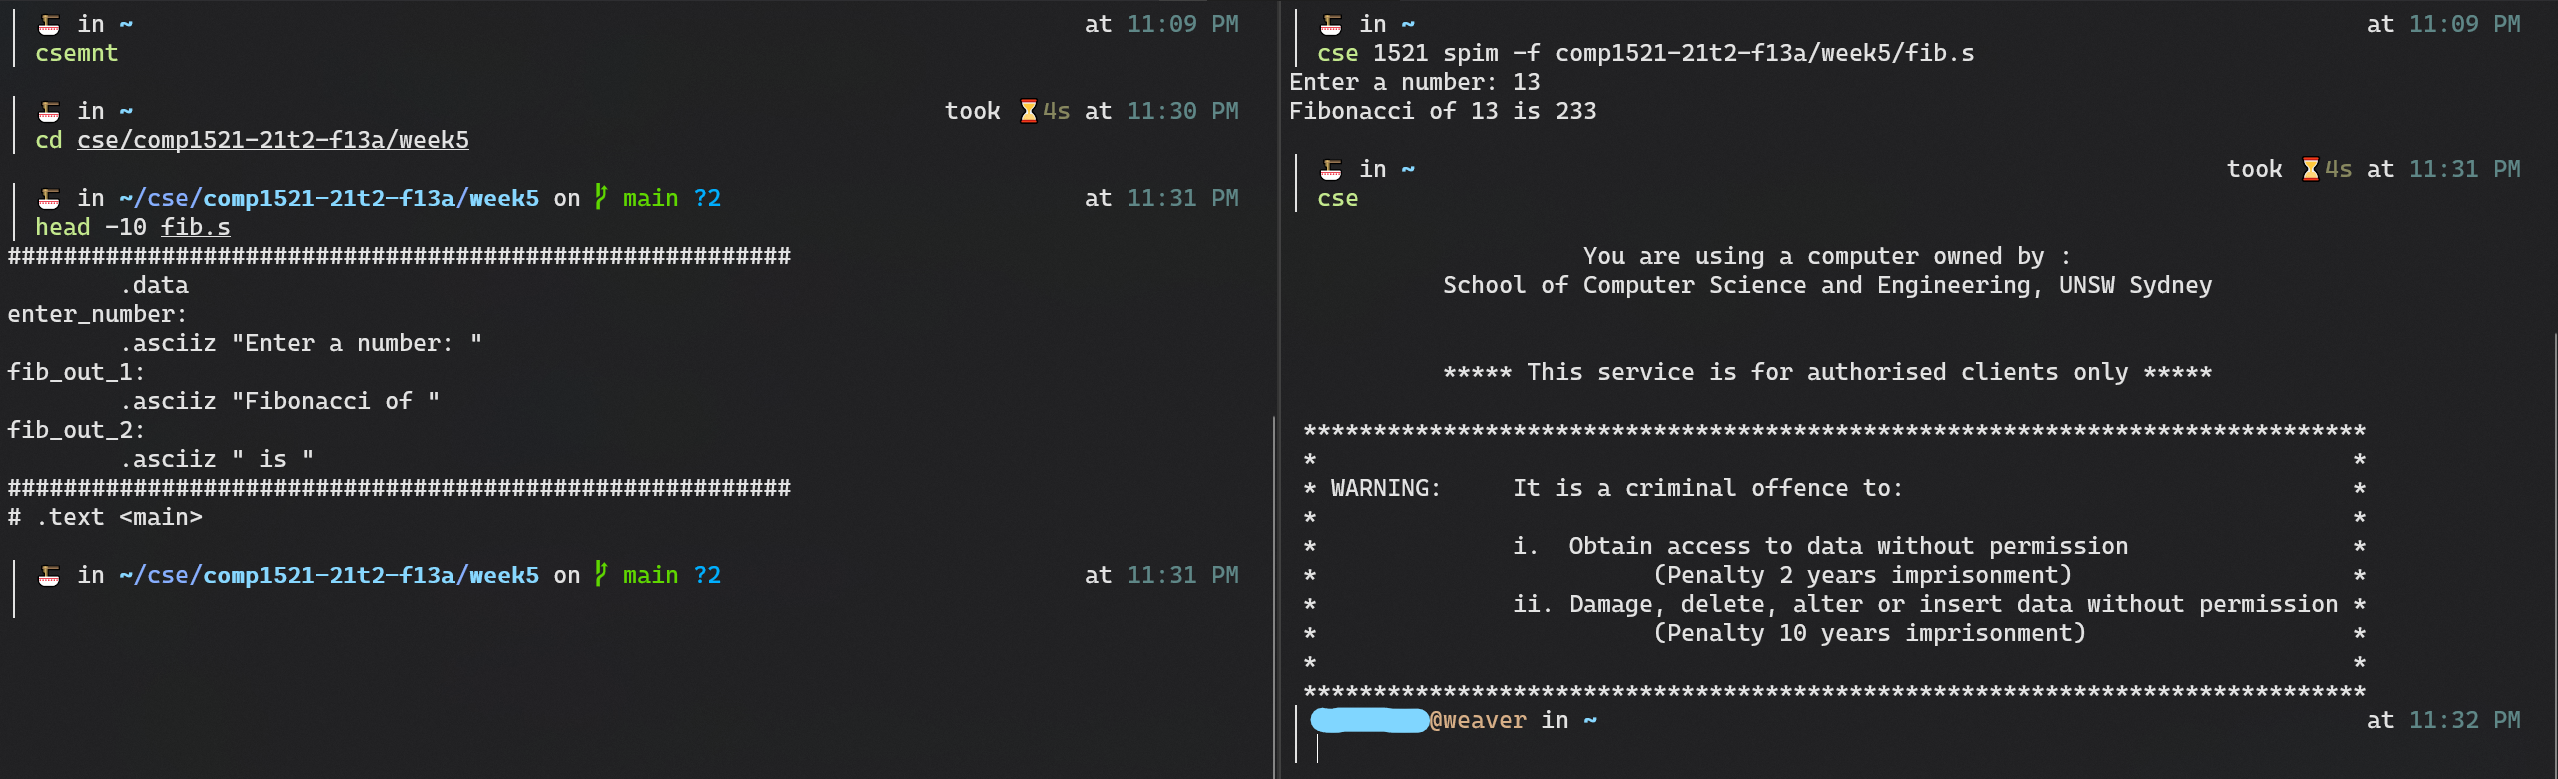
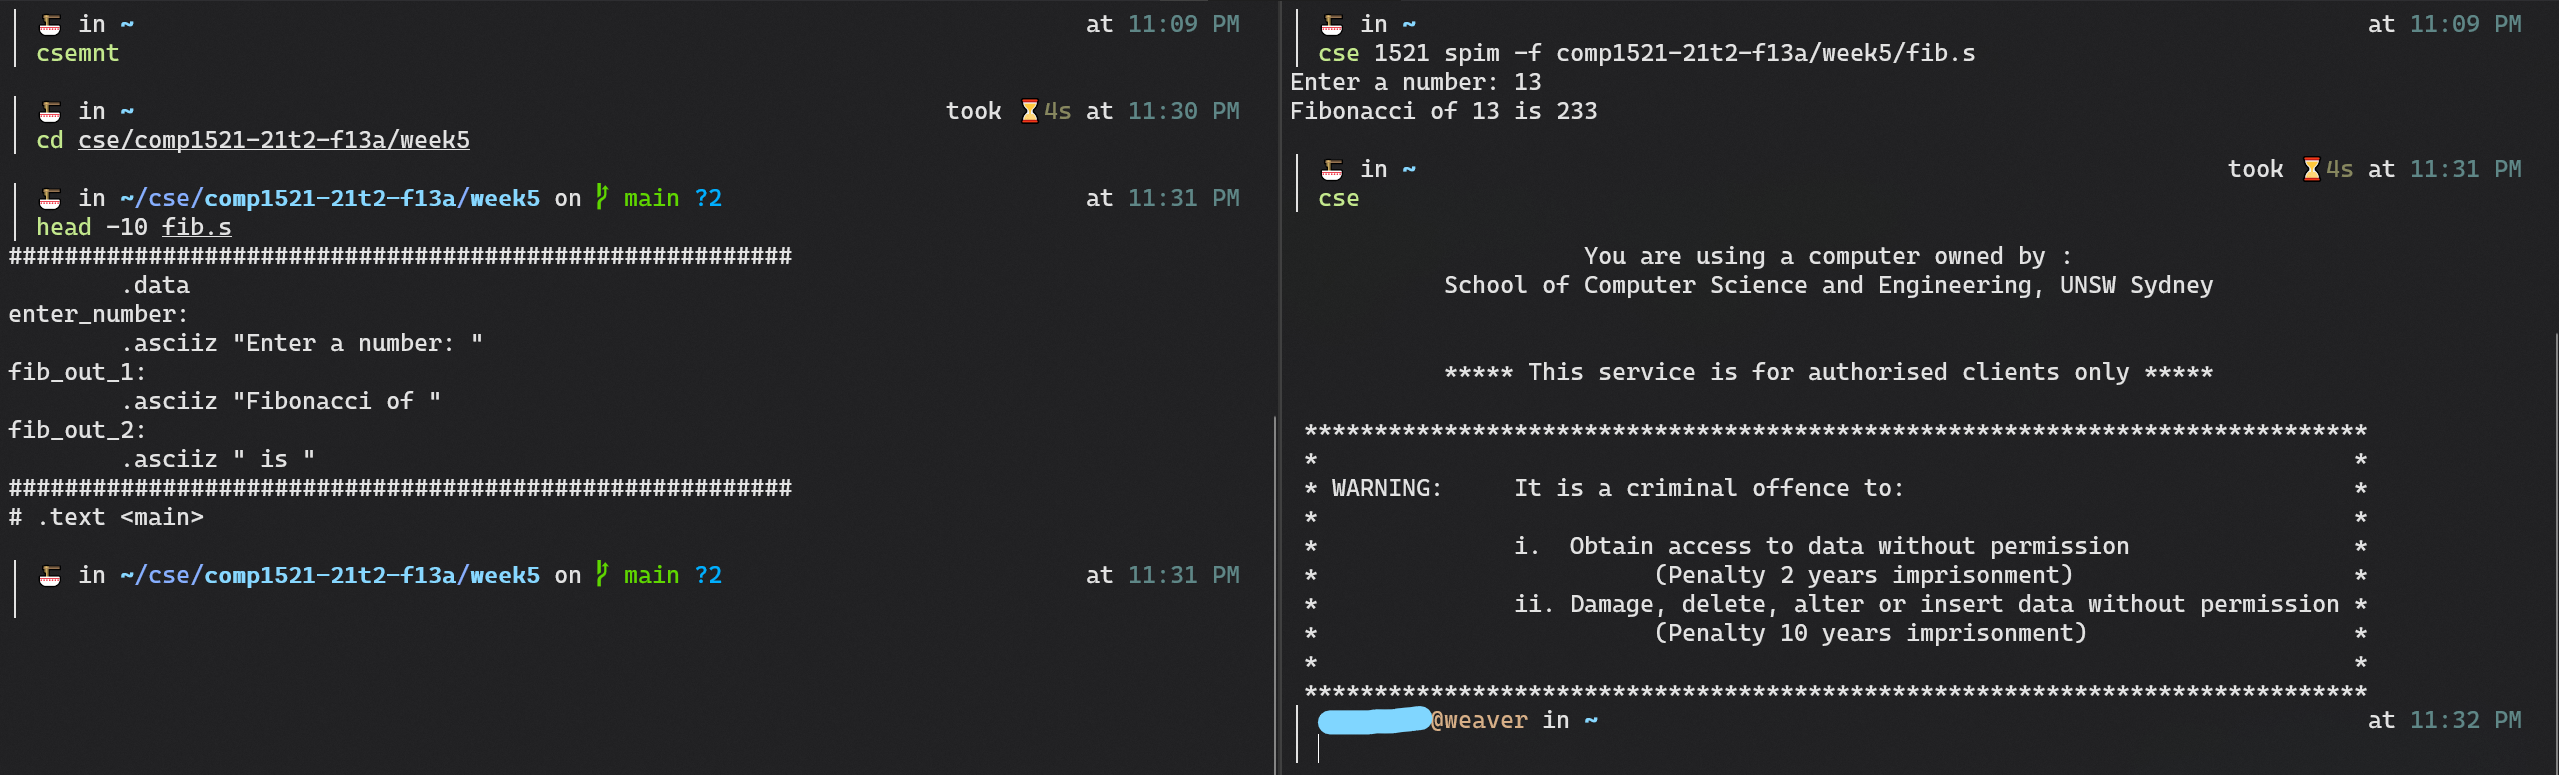
You should now be able to open a new terminal (or run exec bash or exec zsh depending on which shell you use) and be able to enter csemnt to mount your CSE filesystem, and cseumount to unmount. You can also use cse to get a shell on CSE machines, and even directly run a single command by using cse 1521 spim -f factorial.s for example. It’s worth noting that Git operations are particularly slow through SSH FS, so it’s better to get a shell using cse and perform all your Git operations there.
If this doesn’t work, and you’re on bash, make sure to check the relevant part of the troubleshooting section below.
Troubleshooting
mountpoint not empty
This suggests that you’re trying to mount to the ~/cse directory, despite it currently containing files in it, or perhaps being already mounted. If it’s the former, remove these files or move them somewhere else if you need them.
Code.exe: Invalid argument
There’s a weird WSL bug where the code command may not work if you’re in the ~/cse directory, so you may need to run it from outside - that is, try cd ~ && code ~/cse/path/to/file-or-directory.
Aliases in .bashrc don’t work
There’s a chance that your terminal isn’t set up to automatically source .bashrc. To fix this, open ~/.profile, add a newline to the end of the file and paste the following in:
if [ -n "$BASH_VERSION" ]; then
    if [ -f "$HOME/.bashrc" ]; then
    source "$HOME/.bashrc"
    fi
fi
Have feedback, or want to reach out?
If you’ve spotted an error, or have any suggestions or improvements that I can make, feel free to contact me! You can find details at the bottom of this page.
Acknowledgements
While I’ve vaguely known SSHFS has existed for a bit, I never thought to use it until Nicholas Berridge-Argent published a guide to using SSHFS with CSE here . I’ve been using SSHFS ever since, although the only times I really use CSE machines is if I need to demo something on SPIM. This guide merely expands on Nick’s guide, and a massive shoutout goes to him here!
Thanks to @ralismark for their useful feedback (such as pointing out lazy unmounting exists), and for their scripts to easily run commands and get a shell on the remote machine.
This gets worse as you add more extensions. We once spotted someone using a Java language extension eating up nearly a gigabyte of RAM on its own. ↩︎
There are definitely ways to get SSHFS working natively on Windows, but they’re a lot messier, and setting up WSL is definitely advisable. ↩︎
I personally much prefer this setup over both the VS Code Remote-SSH and SSHFS extensions just because it seamlessly interfaces with WSL, which is my regular coding setup. ↩︎
Make sure to have the ‘Remote - WSL’ extension installed in VS Code. There’s also a weird WSL bug where the
codecommand may not work if you’re in the~/csedirectory, so you may need to run it from outside. ↩︎It’s not the worst thing in the world if you forget/are unable to unmount, but you’ll be using up some resources both on your own computer as well as CSE computers. ↩︎