If you're a UNSW student, there's a good chance that you're here from my CSE setup guide for vscode. This is going to be a short guide to setting up WSL, which provides you with a Linux environment within Windows. To go through the WSL section, you'll need to be on Windows 10. If you're here just to learn some basic Git, you can click here to skip all the Windows stuff, free of charge!
Coding locally on your Windows 10 computer with WSL
Windows 10 now supports running Linux distributions from within it. We can set this up so that we can easily
use a lot of the Linux commands and scripting which is taught in UNSW CSE degrees. You can even use your new Linux
setup to go on and learn other languages over breaks, such as Rust.
Before we proceed, there's two versions of WSL that you can use - WSL1 and WSL2. For most people, especially those
of you that are relatively new to programming, WSL1 is the best option. WSL2 is still a bit rough around the edges,
and you can always upgrade later. WSL2 also doesn't play very nicely with Type 2 Hypervisors such as VirtualBox and vmware, since it uses Hyper-V - this will restrict you to using Hyper-V for any virtual machines that you decide to make. If you're someone that uses Docker or really
needs native Linux GUIs, click here for instructions on how to install WSL2.
Installing WSL1
winver.
If you need to update Windows, go
here.- Open PowerShell. Type in PowerShell into Windows Search, right click on the result and click Run as administrator. Select Yes if a prompt shows up.
- Run the following command:
Enable-WindowsOptionalFeature -Online -FeatureName Microsoft-Windows-Subsystem-Linux
If you are prompted to restart your computer, do so. - Open the Microsoft Store. You can again do this using Windows Search.
- Search for Ubuntu and install it. Ubuntu currently has the best support for WSL.
- Once installed, open Ubuntu. You can do this by opening Search and typing in
bash. Once you do this, a terminal should open! - You'll be guided through setting up an account. Make sure you remember what password you use.
- We can now install a C compiler. We'll be using gcc. You can use it just like dcc, but
you'll get less helpful error messages. To install, run the following command:
sudo apt-get install build-essential
Enter your password when prompted. - Run the following command to make sure everything is up to date.
sudo apt update && sudo apt upgrade
You should now be able to use the text based Linux commands you learn during the course, replacing dcc with
gcc. (Note: If you've learnt about dcc --leak-check, it won't work with gcc.)
If you use VSCode, you can use code [filename] to open a file. If you use Vim, Vim will work as
normal. However, gedit won't work. Google 'wsl x server' if you're really desperate to use it.
If you want a prettier terminal with more features to use with WSL, click here to jump to those instructions. If you want to install dcc, click here.
Installing WSL2
- Follow Step 1 and 2 from the above section.
- Run
dism.exe /online /enable-feature /featurename:VirtualMachinePlatform /all /norestartin the same PowerShell window. - Download and run this installer from Microsoft.
- Run
wsl --set-default-version 2in PowerShell. - Follow Step 3 onwards from the above section.
Why is WSL2 seemingly eating my RAM?
If you have WSL2 running for a while, you might see a process called Vmmem in Task Manager eating up all your RAM. You can be relieved to know that this isn't the result of malware, but WSL2 using memory for cache. However, this isn't an issue whatsoever - if another process on your computer needs more RAM, WSL2 will reduce its cache usage - in fact, Windows itself uses any remaining unused RAM as cache to speed up your computer, because unused RAM is wasted RAM.
If this RAM usage still somewhat irrationally annoys you, you can do one of the following:
- Run the following command in your WSL2 terminal.
sudo sh -c \"echo 3 >'/proc/sys/vm/drop_caches' && swapoff -a && swapon -a && printf '\n%s\n' 'Cached RAM and Swap Cleared'\" - Go to
%userprofile%in File Explorer (by entering it into the address bar) and creating a file called .wslconfig and entering the following:[wsl2] memory=4096MB
This restricts WSL2 to 4GB of RAM. If you're running Docker containers from WSL2, I encourage you to let WSL2 use at least half your system memory - I have mine at 12GB, or 60%. If you don't know what Docker is, you can just ignore this.
Installing dcc
Your mileage may vary, but you can install dcc locally! Run the following commands:
curl -L https://github.com/COMP1511UNSW/dcc/releases/download/2.6.4/dcc_2.6.4_all.deb -o
/tmp/dcc_2.6.4_all.deb
curl is a utility in Linux to download files from the internet. You may also see wget sometimes, which is very similar.sudo apt install /tmp/dcc_2.6.4_all.deb
This installs the package we just downloaded.
Now, try compiling and running a program. If this doesn't work, run the commandsudo bash -c "echo 0 > /proc/sys/kernel/yama/ptrace_scope;echo 1 > /proc/sys/vm/overcommit_memory"
,
but only do this if you really need to.
Note that you should still follow the steps to install build-essential from earlier because it has a lot of other useful tools.
Very optional but very cool: Installing Windows Terminal
This part is very very optional, but installs Windows Terminal, which allows you to access cmd, powershell and bash in one place, open multiple terminals (even side-by-side), and most importantly, use themes!
winver.
If you're need to update Windows, go here.- Open the Microsoft Store.
- Search for Windows Terminal and install it. Once installed, you can open it by entering
wtor searching Windows Terminal in Search. - If you want, you can adjust settings. If you know how to read a JSON file, use Ctrl+, to access settings. You can even find themes here.
Setting up Git and GitHub
Git is a really useful tool which allows you backup your code, revert to older versions, keep track of changes, update and pull your code from multiple devices, and provides several tools to allow you to work collaboratively. This is called version control.
Signing up for GitHub
Every developer has a GitHub account. GitHub provides servers for you to host your code, using Git.
- Sign up for GitHub here. This shouldn't take more than a minute
- Get the GitHub Education Pack! GitHub Education is really handy. Students can get GitHub Pro, as well as heaps of other useful tools for free. Visit education.github.com to sign up!
- Follow someone on GitHub for the first time! You can score bonus points by following me here :)
- Create your first repository here. Think of a repository (or repo for short) as somewhere you store all your code for a project. Perhaps call your repo hello-world.
Note: If you're ever using GitHub for coursework, make sure that you make your repo private to prevent plagiarism.
Installing Git
If you're working on VNC, or with the CSE machines over SSH, Git is already installed on these machines! Otherwise, you'll need to install Git.
For Ubuntu/Debian (including WSL):
Run sudo apt-get install git from your terminal.
For Windows and macOS:
Download Git from here, and follow the instructions to install.
Setting up Git on each machine
- Telling Git your name. Run
git config --global user.name "yourusername"- I usually just use my GitHub username here. - Telling Git your email. Run
git config --global user.email
"name@example.com"
- I usually use the private GitHub email ending with @users.noreply.github.com, which can be found here under 'Keep email addresses private'.
Making use of our new repo
Now, we want to make use of our repo, and push code to it.
- Create a folder called HelloWorld somewhere on your computer.
- Open a terminal and use
cduntil you're in your new folder. - Initialise a local repository using the command
git init. This means you've set up a repository within your own computer, which tracks changes. - Make a hello_world.c file in the folder.
Here's some code for you to steal.
#include <stdio.h> int main(void) { printf("Hello world!"); return 0; } - Run
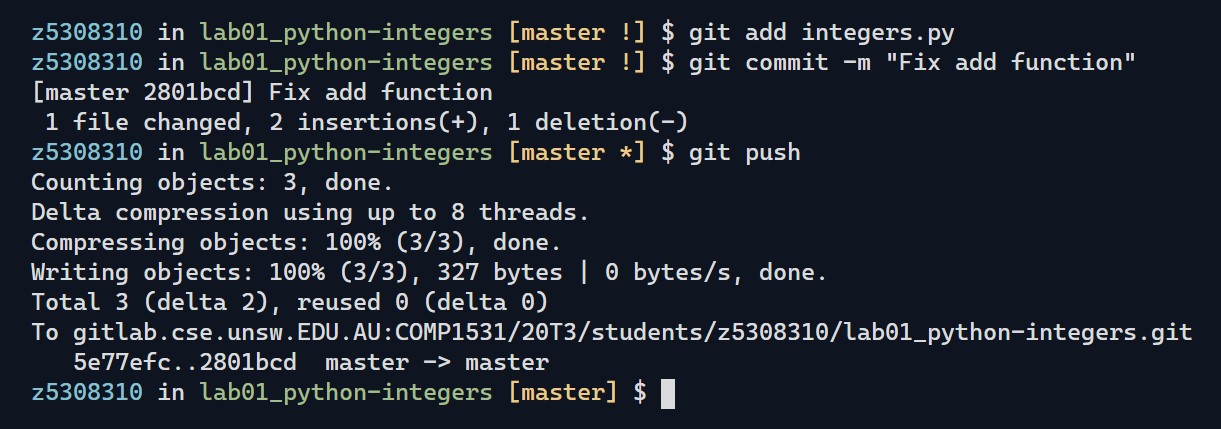
git add hello_world.c. This tells git that you want changes to the file to be included in the next update. If you ever have multiple files that you want to update, usegit add --all. - Run
git commit -m "Initialise repo". This keeps track of the update, noting what changes you've made, and stores it on the local copy of the repository. Your commit message should always describe the changes you've made (in present tense!). - Now, we want to sync our local repository with our remote repository on GitHub. The
first time we do this, we have to tell git where our remote repository is. We do this with
git remote add origin https://github.com/your-username/your-repo-name.git - We can finally push the change to our remote repository. Use
git push.
You should now see your hello_world.c file at https://github.com/your-username/your-repo-name!
You should
always commit and push your code whenever you've
made a notable change, so that you can revert your code if you ever have problems later on. Note that
git will
ask for your GitHub password each time you push. We can avoid this by setting up an SSH
keypair, which you can scroll down to read about.
Using git to work across multiple computers
We can make a copy of our hello-world repository on another computer using
git clone https://github.com/your-username/your-repo-name.git. This sets up a new local
repository with the contents
from the remote repository. Now, we can work on our code on this new computer, and use git add, commit and
push
to update our GitHub repository just like before. Now, when we return to our
original computer, we run
git pull to fetch updates from the remote repository. as soon as we start. This is very
important to do
- if you don't, and realise too late, you'll have to deal with resolving what's called a merge conflict.
There is much, much more to Git. If you want to learn more about Git, and you're a UNSW student, take COMP1531, which teaches you all about Git, especially in the context of teamwork. You can also learn from the slides for this CSESoc workshop.
Using SSH keypairs to push to GitHub
Part 1: Generating a keypair
You'll first need to generate a keypair. If you haven't done this, check out the guide in my other post. If you have, you can use the same keypair.
Part 2: Adding your public key to GitHub
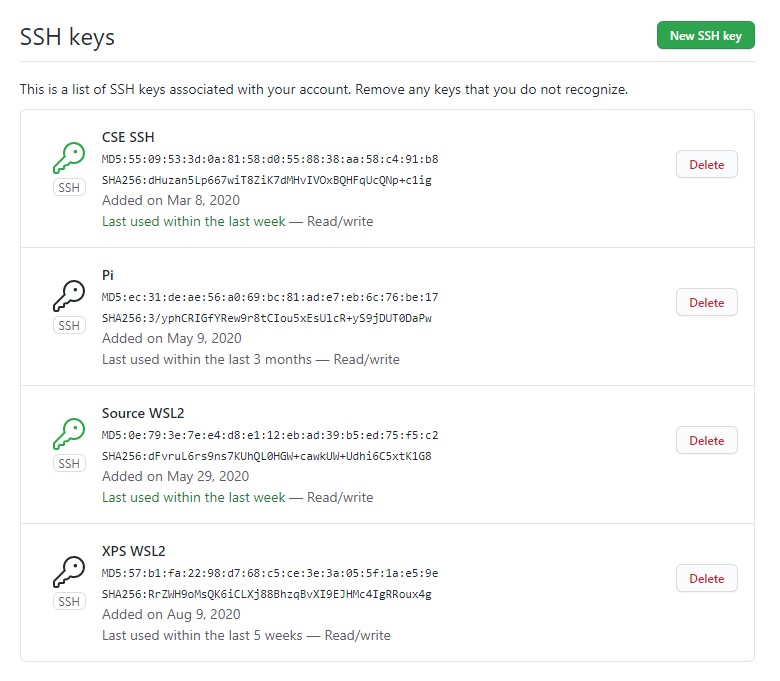
- Open the GitHub Key Settings page. You can find it here. Press Add SSH key.
- Give the key a name to describe what computer it is from. This is so that you don't get mixed up if you add more computers.
- Paste the public key you copied earlier. Press Add when you are done.
Part 3: Updating your local repositories
If you already have any local repositories, you need to update them to use the SSH Git path. To do this,
cd to the directory, and enter
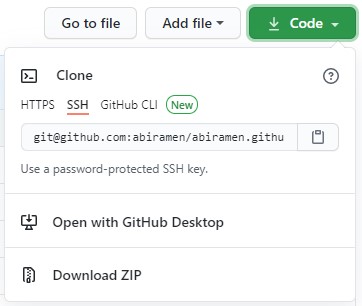
git remote set-url origin git@github.com:your-username/your-repo-name.
If you clone or set
up any new repositories, you will also have
to use the SSH address, i.e. git clone git@github.com:your-username/your-repo-name. If you're
ever unsure as to the SSH path, you can check
on GitHub.